


Traxxas Repair: Troubleshooting Tips for Solving the Most Common RC Car Issues
Posted by RC Superstore on 28th Feb 2024
If you're a fan of RC cars, you know how much fun they can be. But you also know how frustrating it can be when something goes wrong and your car stops working or performs poorly. Whether it's a battery issue, a steering problem, a motor failure, or something else, you want to get your car back in action as soon as possible.
Fortunately, if you’re experiencing an issue with your Traxxas RC car or truck, there’s a good chance someone else has already fixed the same issue. That's why we created this guide—to help you troubleshoot and fix the most common issues that affect Traxxas vehicles. These include:
- Why won't my Traxxas car turn on?
- Why won't my Traxxas car move?
- Why is my Traxxas running backwards?
- Why did my Traxxas servo stop working?
- How do I know if my Traxxas motor is bad?
- What is the reset button on Traxxas remote?
- Why is the red light blinking on my Traxxas transmitter?
- How do I reset my Traxxas transmitter?
- How do I troubleshoot my transmitter?
- How do I reset my Traxxas ESC?
- How do I look for an open circuit in a busted Traxxas RC car?
- How do I reconnect a Traxxas steering column?
- How do I fix a Traxxas RC car that isn’t rebounding?
By following our tips and tricks, you'll be able to get your car back to its peak performance and enjoy the thrill of RC racing again. So, let's get started with the first and arguably most common Traxxas troubleshooting question…
Why Won't My Traxxas Car Turn On?
A Traxxas RC car isn't necessarily broken due to a mechanical or electrical issue if it's not starting. Sometimes, the solution is as simple as checking a switch, a battery, or a channel. Here are some things you should check first:
- Make sure both the car and the transmitter are turned on. This might sound obvious, but sometimes people forget to flip the switch on the car or the transmitter, or they accidentally turn them off during transport or storage.
- Make sure the car and the transmitter are set to the same channel. If you have multiple Traxxas cars or transmitters, you might have switched the channels without realizing it. To sync the car and the transmitter, turn them both off, then turn on the transmitter first, and then the car. The LED on the car should blink once to indicate they are paired.
- Make sure you're using the correct transmitter if you have more than one RC vehicle. If you have different models of Traxxas cars, they might use different frequencies or protocols. For example, the Traxxas TQi transmitter is compatible with the Traxxas Link app, while the Traxxas XL-5 transmitter is not. Check the manuals of your cars and transmitters to see which ones are compatible.
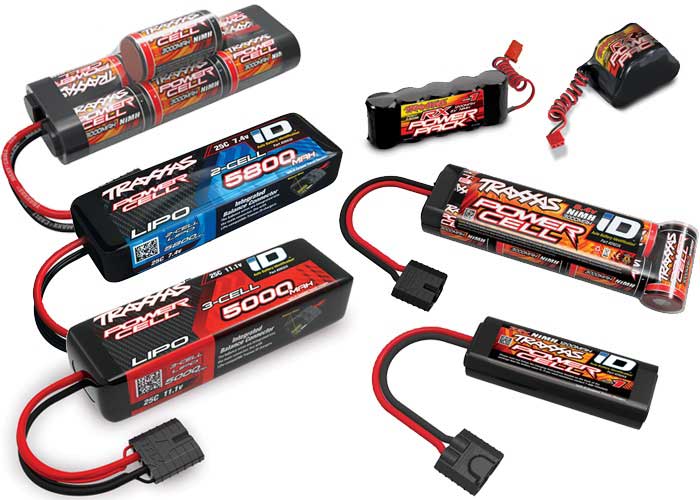
- Make sure that your batteries are fully charged. A low battery can cause your car to lose power or signal. You can use a voltmeter to check the voltage of your batteries, or you can use the Traxxas Link app if your car has a telemetry system. Depending on how many cells your battery has, the recommended voltage for most Traxxas cars is between 7.2V–9.6V for NiMH batteries and 7.4V–14.8V for LiPo batteries. Check out our Traxxas Battery Guide to learn more.
- Make sure that the batteries are installed properly. If the batteries are loose, reversed, or damaged, they might not provide enough current to your car. Check the polarity of the batteries and the connectors, and make sure that they are snug and secure. If you see any signs of corrosion, leakage, or swelling, replace the batteries immediately.
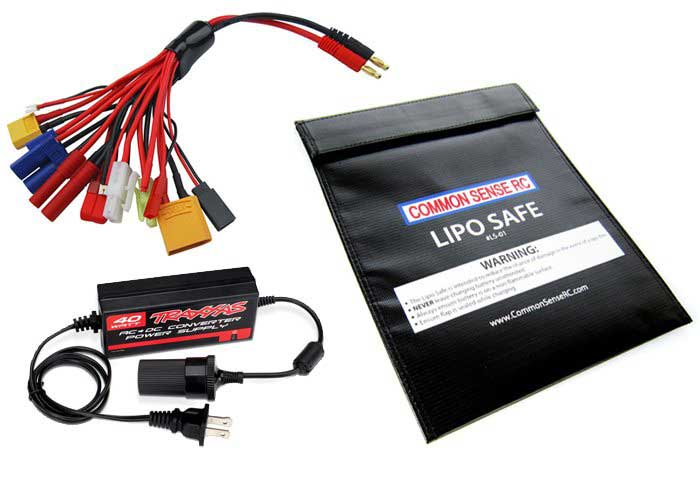
- Make sure that your battery charger is working properly. If your charger is faulty, it might not charge your batteries fully or at all. You can test your charger by using a different battery or a different charger and see if the results change. If you suspect your charger is defective, contact the experts at RC Superstore for assistance.
- Make sure that the antenna is fully extended. If the antenna is bent, broken, or shortened, it might reduce the range and signal quality of your car. Check the antenna on both the car and the transmitter and make sure that they are not obstructed by any metal or electronic objects.
Are you still dealing with an unresponsive car after going through this troubleshooting list? You may have a mechanical or electrical issue that requires more advanced diagnosis and repair. In the next section, we'll show you how to identify and fix some common Traxxas issues.
Why Won't My Traxxas Car Move?

It can be frustrating when your Traxxas car doesn't respond to your commands. You might think something is wrong with your car or that you need to replace some parts. However, before you jump to any conclusions, you should try some basic troubleshooting steps to see if you can fix the problem yourself.
- Check the battery level of your car. If the battery is low or dead, it will not provide enough power to run the motor. Replace or recharge the battery and make sure that it is properly connected to the speed control.
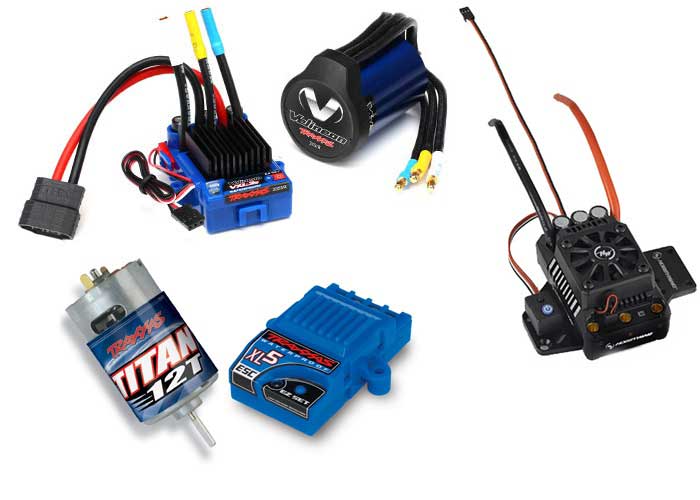
- Check the motor and the speed control for any signs of damage, overheating, or loose wires. If the motor or the speed control is burned out, shorted, or disconnected, it will prevent the car from moving. You may need to replace the motor or the speed control if they are damaged or defective.
- Check the drivetrain for any obstructions, broken parts, or excessive wear. If the gears, shafts, bearings, or wheels are jammed, stripped, cracked, or worn out, that can affect the performance and movement of your car. You may need to clean, lubricate, adjust, or replace the drivetrain components if they are faulty or worn out.
- Check the calibration of your transmitter and speed control. If the transmitter and speed control are not calibrated correctly, they will not communicate the proper signals to the motor. You may need to recalibrate the transmitter and speed control according to the instructions in your manual.
If none of these troubleshooting tips solve the problem, you may need to contact Traxxas customer support for further assistance. They can help you diagnose and resolve the issue or recommend an authorized service center near you.
Why Is My Traxxas Running Backwards?
There's nothing like driving your Traxxas car at high speed and performing amazing stunts. But what if your car suddenly starts running backward or doesn't move at all? You might feel disappointed or angry that your fun is ruined. Don't worry, you don't have to give up on your car or spend a lot of money on repairs.
You can first try these simple troubleshooting steps to see if you can get your car back in the right direction:
- Check to see if the motor wires are reversed. If they are, you need to swap the two motor wires that connect the speed control to the motor. Make sure to disconnect the battery before doing this. Then, test the vehicle and see if it runs in the correct direction.
- Check if the transmitter's steering and throttle channels are reversed. To fix this, you need to access the transmitter's programming menu and change the settings for the steering and throttle channels. Refer to your owner’s manual for the specific steps on how to do this. Then, test the vehicle and see if it runs in the correct direction.
Why Did My Traxxas Servo Stop Working?
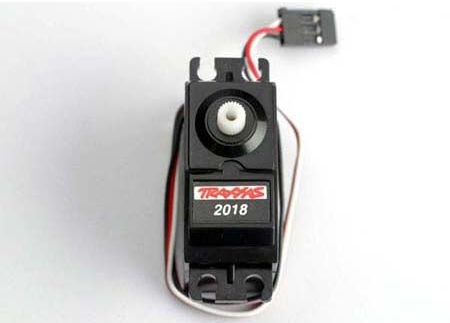
If your Traxxas servo stopped working, it could be due to several possible causes. Here are some common troubleshooting tips to help you identify and fix the problem:
- Check the servo wires for any damage or loose connections. If the wires are cut, frayed, or shorted, they may cause the servo to malfunction or burn out. You can use a multimeter to test the continuity of the wires and see if there is any breakage or short circuit. If the wires are damaged, you may need to replace the servo or solder new wires to the servo board.
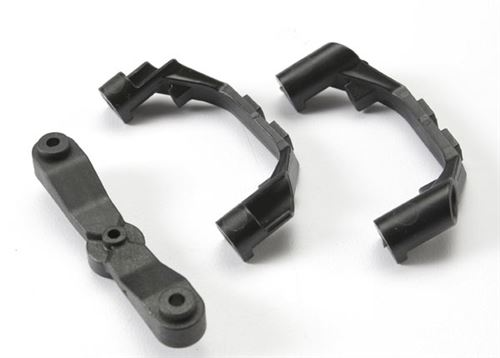
- Check the servo saver for any wear or damage. The servo saver is a spring-loaded device that protects the servo from excessive stress or shock. If the servo saver is worn out, broken, or missing, it may cause the servo to overwork or fail. You can replace the servo saver with a new one that matches your servo model and vehicle type.
- Check the servo horn for any cracks or stripped teeth. The servo horn is the plastic or metal arm that connects the servo to the steering linkage. If the servo horn is cracked or stripped, it may cause the servo to lose control or stop working. You can replace the servo horn with a new one that fits your servo spline and vehicle type.
- Check the servo gears for any damage or wear. The servo gears are the internal components that transfer the power from the motor to the servo horn. If the servo gears are damaged or worn, they may cause the servo to make noise, lose torque, or stop working. You can open the servo case and inspect the gears for any signs of damage or wear. If the gears are damaged, you may need to replace the servo or buy a gear set that matches your servo model.
- Check the servo voltage and current rating. If the servo voltage or current rating is too low for your battery or speed control, it may cause the servo to overheat, draw too much current, or stop working. You can check the servo voltage and current rating on the servo label or the manufacturer's website. If it is too low, you may need to replace the servo with one that has a higher voltage or current rating.
If your servo is technically working but doing one of the following, please consult our RC servo troubleshooting guide for more tips.
- The servo is overheating
- The servo is twitching
- The servo is chattering
- The servo is emitting a high-pitched sound
How Do I Know If My Traxxas Motor Is Bad?
If your Traxxas motor is making unusual noises or not performing as expected, you may need to do some troubleshooting to find the cause of the problem. Here are some common tips to help you diagnose and fix your RC motor issues:
- Check the wires and connectors. Make sure the wires from the motor to the speed control are not damaged, loose, or frayed. Also, check that the connectors are clean and firmly plugged in. If you see any signs of corrosion, dirt, or overheating on the connectors, you may need to replace them or clean them with a contact cleaner.
- Check the motor temperature. After running your vehicle for a few minutes, check the motor to see how hot it is. If it is too hot to touch, it means the motor is overheating and may be damaged or worn out. Overheating can be caused by several factors, such as excessive load, low battery voltage, improper gearing, or lack of ventilation. To prevent overheating, you can try reducing the load, using a higher voltage battery, changing the gear ratio, or adding a cooling fan or heatsink to the motor.
- Check the motor bearings. The motor bearings are located at both ends of the motor shaft and allow it to spin smoothly and quietly. If the bearings are worn out, dirty, or damaged, they can cause friction, noise, and reduced performance. To check the motor bearings, remove the motor from the vehicle and spin the shaft by hand. If you feel any resistance, grinding, or wobbling, it means the bearings need to be replaced or cleaned. You can use a bearing puller tool to remove the old bearings and install new ones, or you can use a bearing cleaner spray to clean the existing ones.
- Check for stripped gears. If your motor appears to have stripped gears, you’ll need to purchase replacement gears. If they aren’t stripped, the gears can sometimes be realigned and that will solve the problem.
- Check the motor brushes and commutator. If you have a brushless model, please ignore this step. The motor brushes are carbon blocks that transfer electricity to the commutator, which is a metal cylinder with segments that rotates with the motor shaft. The brushes and the commutator are subject to wear and tear over time and can affect the motor performance and efficiency. To check the brushes and the commutator, remove the motor end cap and inspect them for signs of wear, damage, or dirt. If the brushes are worn down, uneven, or chipped, you may need to replace them with new ones. If the commutator is discolored, grooved, or pitted, you may need to resurface it with a commutator lathe or fine-grit sandpaper. You can also use a brush hood alignment tool to make sure the brushes are properly aligned with the commutator segments.
If you’ve determined your motor is bad, we offer a huge selection of replacement RC motors that are compatible with whatever Traxxas model you’re running.
What Is The Reset Button On A Traxxas Remote?
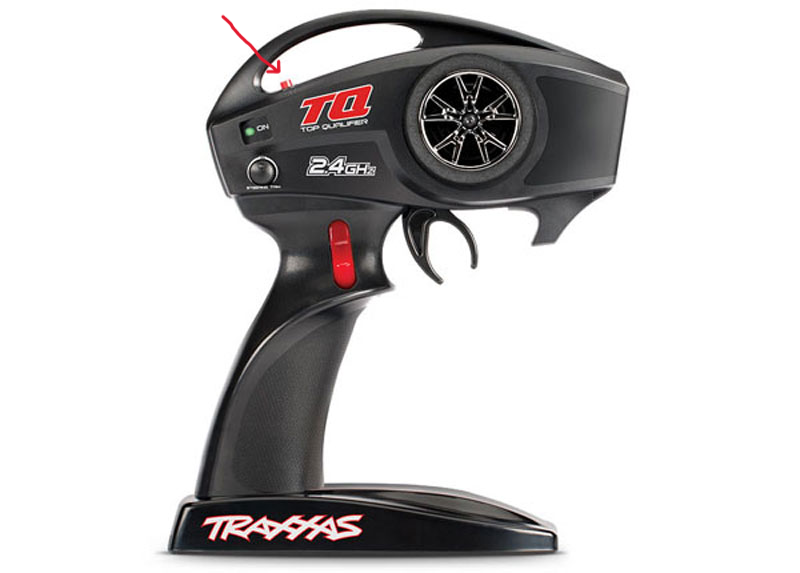
The reset button on most Traxxas remotes is a small red button located on the back of the transmitter, near the battery compartment. The reset button is used to restore the transmitter settings to the factory defaults in the event you need to troubleshoot or recalibrate your remote.
To reset your Traxxas remote, follow these steps:
- Turn off your transmitter and receiver.
- Press and hold the reset button for about three seconds until the LED indicator flashes red.
- Release the reset button and turn on your transmitter. The LED indicator should flash green.
- Turn on your receiver and wait for the transmitter and receiver to bind. The LED indicator should turn solid green.
Your Traxxas remote is now reset to the factory settings.
Why Is The Red Light Blinking On My Traxxas Transmitter?
The red light might blink on your Traxxas transmitter for any of the following reasons:
- The transmitter batteries are low. Replace them with fresh alkaline batteries or rechargeable NiMH batteries.
- The transmitter is in low voltage mode. Press and hold the menu button for three seconds to exit this mode.
- The transmitter and receiver are not bound. Turn off both the transmitter and the vehicle, then turn on the transmitter and press and hold the link button until the green LED blinks. Then turn on the vehicle and wait for the transmitter and receiver to bind. The LED indicator should turn solid green.
- The transmitter is in programming mode. Press and release the menu button to exit this mode.
- The transmitter is in fail-safe mode. This means the receiver has lost signal from the transmitter and is applying the preset brake and throttle positions. To exit this mode, turn off the vehicle and then turn on the transmitter. The LED indicator should turn solid green.
If the problem persists, you may need to contact Traxxas customer support or visit their website for more troubleshooting tips.
How Do I Reset My Traxxas Transmitter?
To reset your Traxxas transmitter, follow these steps:
- Turn off the vehicle and disconnect the battery.
- Hold down the Menu button on the transmitter for three seconds until the LED flashes red. This will enter the programming mode.
- Press the Set button to cycle through the options until you reach the Reset option. The LED will flash green and red alternately.
- Press and hold the Set button for three seconds until the LED turns solid green. This will confirm the reset and exit the programming mode.
- Reconnect the battery and turn on the vehicle.
The transmitter should now be reset to the factory settings.
How Do I Troubleshoot My Transmitter?
If you’re having issues with your Traxxas transmitter not turning on, follow these steps for basic RC transmitter repair:
- Open the cover on your transmitter to view its circuit board.
- As a closed-circuit system, your transmitter should have touching contact points at the copper plates. You may be able to get away with an easy fix like bending the metal contacts if you see that your copper plates aren’t touching.
- Getting those contacts touching sometimes requires you to clip off screws to cause your circuit board to screw in closer to close the gaps between your metal and your copper plates.
- If it still isn’t working, you may need to purchase a replacement transmitter.
How Do I Reset My Traxxas ESC?
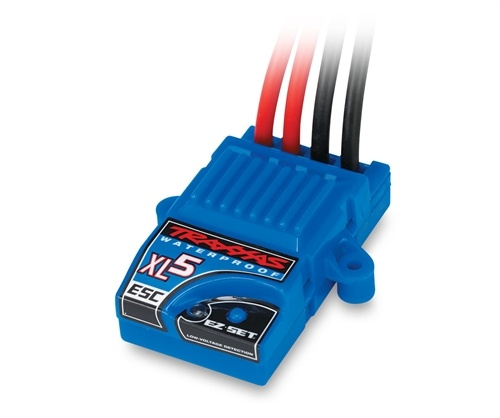
To reset your Traxxas electronic speed control (ESC), follow these steps:
- Turn on your transmitter and set the throttle trim to the neutral position.
- Connect a fully charged battery pack to the ESC and switch it on.
- Wait for the ESC to emit a series of tones indicating the neutral point has been detected.
- Press and hold the EZ-Set button until the ESC emits a long beep, followed by a green LED flash. This indicates the ESC is now in programming mode.
- Release the EZ-Set button and wait for the ESC to emit two beeps, followed by two green LED flashes. This indicates the ESC is ready to accept the low voltage setting.
- Press and hold the EZ-Set button until the ESC emits a long beep, followed by two red LED flashes. This indicates the ESC has accepted the low voltage setting and is ready to accept the high voltage setting.
- Release the EZ-Set button and wait for the ESC to emit three beeps, followed by three green LED flashes. This indicates the ESC is ready to accept the high-voltage setting.
- Press and hold the EZ-Set button until the ESC emits a long beep, followed by three red LED flashes. This indicates the ESC has accepted the high voltage setting and is ready to accept the reverse mode setting.
- Release the EZ-Set button and wait for the ESC to emit four beeps, followed by four green LED flashes. This indicates the ESC is ready to accept the reverse mode setting.
- Press and hold the EZ-Set button until the ESC emits a long beep, followed by four red LED flashes. This indicates the ESC has accepted the reverse mode setting and is ready to exit the programming mode.
- Release the EZ-Set button and wait for the ESC to emit a series of tones indicating the ESC has been reset and is ready to operate.
You have successfully reset your Traxxas ESC. For more information, please refer to your user manual or visit the Traxxas website.
How Do I Look For An Open Circuit In A Busted Traxxas RC Car?
An open circuit is a break in the electrical path that prevents the current from flowing through the components of your RC car, causing it to stop working or behave erratically. An open circuit can be caused by various factors, such as physical damage, corrosion, moisture, dirt, or overheating.
To prevent open circuits, you should always handle your RC car with care, keep it clean and dry, and avoid exposing it to extreme temperatures or humidity. You should also regularly inspect your circuit board and wires for any wear and tear and perform maintenance as needed.
To find and fix an open circuit, you need to inspect your circuit board and wires for any gaps, breaks, or loose connections. Here are some steps to help you troubleshoot your RC car wiring issues:
- Turn off your transmitter and receiver and disconnect the battery from the ESC. Remove the body shell and expose the circuit board.
- Use a multimeter to test the continuity of the circuit. Set the multimeter to the resistance mode and touch the probes to the positive and negative terminals of the battery connector. If the multimeter shows a low resistance value (close to zero), the circuit is closed and there is no open circuit. If the multimeter shows a high resistance value (infinity or OL), the circuit is open and there is a break somewhere.
- Trace the wires from the battery connector to the ESC, motor, and servo. Look for any signs of damage, such as cuts, nicks, frays, or burns. Also, check the solder joints and connectors for any loose or broken connections. If you find any damaged wires, you need to repair them by stripping and soldering the ends together. If you find any faulty connectors or solder joints, you need to replace them or re-solder them securely.
- Test the continuity of each component separately by touching the multimeter probes to the corresponding wires or terminals. For example, to test the ESC, touch the probes to the red and black wires that connect the ESC to the battery. To test the motor, touch the probes to the blue and yellow wires that connect the ESC to the motor. To test the servo, touch the probes to the red and black wires that connect the receiver to the servo. If any component shows a high resistance value, it means that it is defective and needs to be replaced.
- Reconnect the battery to the ESC and turn on your transmitter and receiver. Test your RC car and see if it works normally. If not, repeat the steps above until you find and fix the open circuit.
How Do I Reconnect a Traxxas Steering Column?
If your steering arm is disconnected from the servo, you can often use superglue for a quick fix. In some cases, attaching wires can also reconnect the two components. While a steering column repair job can usually be done superficially, consider opening up your Traxxas RC car if you’d like easier access.
How Do I Fix A Traxxas RC Car That Isn’t Rebounding?
If your RC vehicle isn’t rebounding, it’s likely due to a mechanical issue stemming from damaged shocks. The necessary fix can vary from a simple cleaning to a full replacement.
Here are the top shock issues to look for while diagnosing your Traxxas RC car or truck:
- A cracked shock cap that is hemorrhaging oil.
- Dirty shocks (shocks can be cleaned with soap and water without being disassembled).
- Air bubbles caused by an incomplete oil change.
- Rocks and debris stuck between your control arms.
Consider replacing your Traxxas RC car shocks if all these issues come back clear during diagnostics. Don’t forget that shock oil should be part of your routine Traxxas maintenance.
Find The Best Parts For Traxxas Repair At RC Superstore
The best way to keep your Traxxas in top shape is to maintain it with reliable parts from RC Superstore. In fact, it’s worth considering upgrading several Traxxas RC car parts for better performance if your car is struggling to reach its potential for speed and power.
For more information on quick fixes and other Traxxas help, reach out to our team today.